This Playbook will install a WordPress Content Management System (CMS) within a LAMP environment (Linux, Apache, MySQL, and PHP) on two remote servers in a private network. The LAMP versioning highlights the following for each layer:
- Linux - Ubuntu 18.04 ( 1 Virtual machine designated as the master node and two managed nodes for hosting the WordPress CMS). Vagrant and VirtualBox create these machines.
- Apache2 - The Apache HTTP server is the most widely-used web server in the world. It provides many powerful features, including dynamically loadable modules, robust media support, and extensive integration with other popular software.
- MySQL 5.7 - MySQL is the world’s most popular open-source relational database management system.
- PHP 7.4 - PHP is a popular general-purpose scripting language that is especially suited to web development.
Create Vagrant private network
Creating a robust sandbox environment for rapid prototyping eliminates the risk of crashing or breaking other functions when using servers or your local machine when purposed for other vital tasks. We’ll create a private network that you can install on any local device (i.e., laptop) as long as VirtualBox is available via Vagrant. The vagrantfile seen below can build test virtual machines (VM’s) for our Ansible playbook testing environment. If you prefer using a public cloud such as AWS, Azure, GCP, or Digital Ocean, the logical design is easy to follow.
###############
# Vagrantfile #
###############

# -*- mode: ruby -*-
# vi: set ft=ruby :

# All Vagrant configuration is done below. The "2" in Vagrant.configure
# configures the configuration version (we support older styles for
# backwards compatibility). Please don't change it unless you know what
# you're doing.

Vagrant.configure("2") do |config|
  config.vm.define "ansible-master" do |vm1|
    vm1.vm.box = "bento/ubuntu-18.04"
    vm1.vm.hostname = "ansible-master"
    vm1.vm.network "private_network", ip: "10.23.45.10"

    config.vm.provider "virtualbox" do |vb|
	  vb.gui = false
	  vb.memory = "4096"
      vb.cpus = "2"
	  vb.customize ['modifyvm', :id, '--cableconnected1', 'on']
    end
	config.vm.provision "shell", run: "always", inline: <<-SHELL
		echo "Welcome to the Ubuntu Ansible network."
	SHELL
  end

  config.vm.define "ansible-node1" do |vm2|
    vm2.vm.box = "bento/ubuntu-18.04"
    vm2.vm.hostname = "ansible-node1"
    vm2.vm.network "private_network", ip: "10.23.45.20"

    config.vm.provider "virtualbox" do |vb|
	  vb.gui = false
	  vb.memory = "2048"
      vb.cpus = "2"
	  vb.customize ['modifyvm', :id, '--cableconnected1', 'on']
    end
	config.vm.provision "shell", run: "always", inline: <<-SHELL
		echo "Welcome to the Ubuntu Ansible network."
	SHELL
  end

  config.vm.define "ansible-node2" do |vm3|
    vm3.vm.box = "bento/ubuntu-18.04"
    vm3.vm.hostname = "ansible-node2"
    vm3.vm.network "private_network", ip: "10.23.45.30"

    config.vm.provider "virtualbox" do |vb|
	  vb.gui = false
	  vb.memory = "2048"
      vb.cpus = "2"
	  vb.customize ['modifyvm', :id, '--cableconnected1', 'on']
    end
	config.vm.provision "shell", run: "always", inline: <<-SHELL
		echo "Welcome to the Ubuntu Ansible network."
	SHELL
  end
end
Configure the Master node and SSH connection
To begin using Ansible to manage your server infrastructure, you need to install the Ansible software on the machine that will serve as the Ansible master node. First, connect via SSH to the virtual machine.
PS C:\\..\\vagrant\\ubuntu_ansible> vagrant ssh ansible-master
By default, Vagrant will be the user on the machine; however, an admin account with sudo privileges creates the specific purpose of using Ansible to talk to the other virtual machines in the network. Use the adduser command as the root user first to add a new user to your system:
There will be a prompt to enter a password of your choice.
vagrant@ansible-master:~$ sudo -i
root@ansible-master:~# adduser admin
Use the usermod command to add the user to the sudo group and test if the sudo commands work when logged into the user account.
root@ansible-master:~# usermod -aG sudo admin
root@ansible-master:~# su - admin

admin@ansible-master:~$ sudo apt-get update
Run the following command to include the official project’s PPA (personal package archive) in your system’s list of sources:
admin@ansible-master:~$ sudo apt-add-repository ppa:ansible/ansible
Press ENTER when prompted to accept the PPA addition.
Next, refresh your system’s package index to be aware of the packages available in the newly included PPA and then proceed to install.
admin@ansible-master:~$ sudo apt-get update
admin@ansible-master:~$ sudo apt install ansible
Configure password-less authentication
We will set up password-less authentication for our admin user from master to all the managed nodes by generating a public-private key pair using ssh-keygen. We have pre-defined a blank password using -P “” This step will create private and public key pair located in the ~/.ssh directory.
admin@ansible-master:~$ ls -al ~/.ssh/
total 20
drwx------ 2 admin admin 4096 Apr  3 08:03 .
drwxr-xr-x 6 admin admin 4096 Apr  4 22:57 ..
-rw------- 1 admin admin 1675 Apr  3 07:49 id_rsa
-rw-r--r-- 1 admin admin  402 Apr  3 07:49 id_rsa.pub
-rw-r--r-- 1 admin admin  444 Apr  3 07:48 known_hosts
We will use ssh-copy-id to copy the keys to the remote managed server and add it to authorized_keys.
admin@ansible-master:~$ ssh-copy-id -i ~/.ssh/id_rsa.pub vagrant@10.23.45.20
admin@ansible-master:~$ ssh-copy-id -i ~/.ssh/id_rsa.pub vagrant@10.23.45.20
SSH and Admin user setup with Setup playbook
The setup_ubuntu1804 folder in the Github repository runs an independent playbook that will execute an initial server setup for the managed nodes. The options stores in the vars/default.yml variable file. We define the following setting below:
create_user: The name of the remote sudo user to create. In our case, it will be admin.copy_local_key: Path to a local SSH public key that will be copied as an authorized key for the new user. By default, it copies the key from the current system user running Ansible.sys_packages: An array with a list of fundamental packages to be installed.
Run the playbook with the following commands.
admin@ansible-master:~/.../setup_ubuntu1804$ ansible-playbook -i inventory -u admin playbook.yml
Once the Playbook completes as successful, you can test the SSH connection with the following Ansible commands for our inventory with ansible all -i inventory -m ping and ansible-inventory -i inventory --list.
admin@ansible-master:~/.../setup_ubuntu1804$ ansible all -i inventory -m ping
ansible-node2 | SUCCESS => {
    "changed": false,
    "ping": "pong"
}
ansible-node1 | SUCCESS => {
    "changed": false,
    "ping": "pong"
}

admin@ansible-master:~/.../wordpress-lamp_ubuntu1804$ ansible-inventory -i inventory --list
{
    "_meta": {
        "hostvars": {
            "ansible-node1": {
                "ansible_host": "10.23.45.20",
                "ansible_python_interpreter": "/usr/bin/python3"
            },
            "ansible-node2": {
                "ansible_host": "10.23.45.30",
                "ansible_python_interpreter": "/usr/bin/python3"
            }
        }
    },
    "all": {
        "children": [
            "servers",
            "ungrouped"
        ]
    },
    "servers": {
        "hosts": [
            "ansible-node1",
            "ansible-node2"
        ]
    }
}
Run the WordPress LAMP Playbook
Navigate to the wordpress-lamp_ubuntu1804 folder and use the tree command to see the following structure:
admin@ansible-master:~/wordpress-ansible/wordpress-lamp_ubuntu1804$ tree
.
├── files
│   ├── apache.conf.j2
│   ├── client.my.cnf
│   ├── client.my.cnf.j2
│   └── wp-config.php.j2
├── inventory
├── playbook.yml
├── readme.md
└── vars
    └── default.yml
Here is the following description of what each of these files is:
files/apache.conf.j2: Template file for setting up the Apache VirtualHost.files/wp-config.php.j2: Template file for setting up WordPress’s configuration file.files/client.my.cnf: The initial client.my.cnf is provided without a password and used to obtain a connection from which roots password updates to the managed nodes we want to store for MySQL database connection.files/client.my.cnf.j2: Contains the same structure as the initial client.my.cnf file but as a jinja2 Template file for better portability.inventory: Keeps track of which nodes and hosts will be a part of the infrastructure on which playbooks and ad-hoc commands will run.vars/default.yml: Variable file for customizing playbook settings.playbook.yml: The playbook.yml file is where all tasks from this setup are defined. It starts by defining the group of servers that should target this setup (all). It uses become: true to describe that tasks should be executed with privilege escalation (sudo) by default. Then, it includes thevars/default.ymlvariable file to load configuration options.
Here are the contents of each of the files respectively that should be edited:
client.my.cnf
[client]
user=root
password=
socket=/var/run/mysqld/mysqld.sock
client.my.cnf.j2
[client]
user=root
password={{ mysql_password }}
socket=/var/run/mysqld/mysqld.sock
inventory
[servers]
ansible-node1 ansible_host=10.23.45.20
ansible-node2 ansible_host=10.23.45.30

[all:vars]
ansible_python_interpreter=/usr/bin/python3
vars/default.yml
---
#System Settings
php_modules: [ 'php7.4-curl', 'php7.4-cli', 'php7.4-dev', 'php7.4-gd', 'php7.4-mbstring', 'php7.4-mcrypt', 'php7.4-json', 'php7.4-tidy', 'php7.4-opcache', 'php
7.4-xml', 'php7.4-xmlrpc', 'php7.4-pdo', 'php7.4-soap', 'php7.4-intl', 'php7.4-zip' ]

#MySQL Settings
mysql_root_password: "Passw0rd"
mysql_db: "Wordpress_db"
mysql_user: "db_user"
mysql_password: "admin123!"

#HTTP Settings
http_host: "your_domain"
http_conf: "your_domain.conf"
http_port: "80"
The following list contains a brief explanation of each of these variables if they should edit or change for any reason.
php_modules: An array containing PHP 7.4 extensions that support your WordPress setup. This list is extensive to support more features.mysql_root_password: The desired password for the root MySQL account.mysql_db: The name of the MySQL database intended for WordPress.mysql_user: The name of the MySQL user for WordPress.mysql_password: The password for the new MySQL user.http_host: Your domain name.http_conf: The name of the configuration file within Apache.http_port: HTTP port for the virtual host. By default, it is80.
Once you’ve verified that the variables are correct, you can run the Playbook to install WordPress on the managed node(s) with the ansible-playbook command below:
admin@ansible-master:~/.../wordpress-lamp_ubuntu1804$ ansible-playbook -i inventory -u admin playbook.yml
When the Playbook finishes all of its tasks, you should see a Play recap of all the events. “OK” means the task is done and configured correctly from the last run, or “changed” if Ansible finds the task alters the current state configured on the managed node(s).
PLAY RECAP ****************************************************************************************************************************************************
ansible-node1              : ok=28   changed=10   unreachable=0    failed=0    skipped=1    rescued=0    ignored=0
ansible-node2              : ok=28   changed=11   unreachable=0    failed=0    skipped=1    rescued=0    ignored=0
To see if WordPress is up and running, navigate to the managed node’s domain name or IP address. In our case, it would be the following:
[<http://10.23.45.20>](<http://10.23.45.20>) → http://10.23.45.20/wp-admin/install.php
[<http://10.23.45.30>](<http://10.23.45.30>) → http://10.23.45.30/wp-admin/install.php
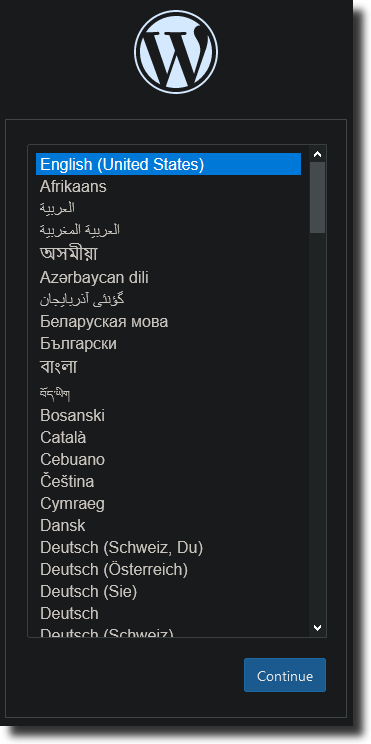
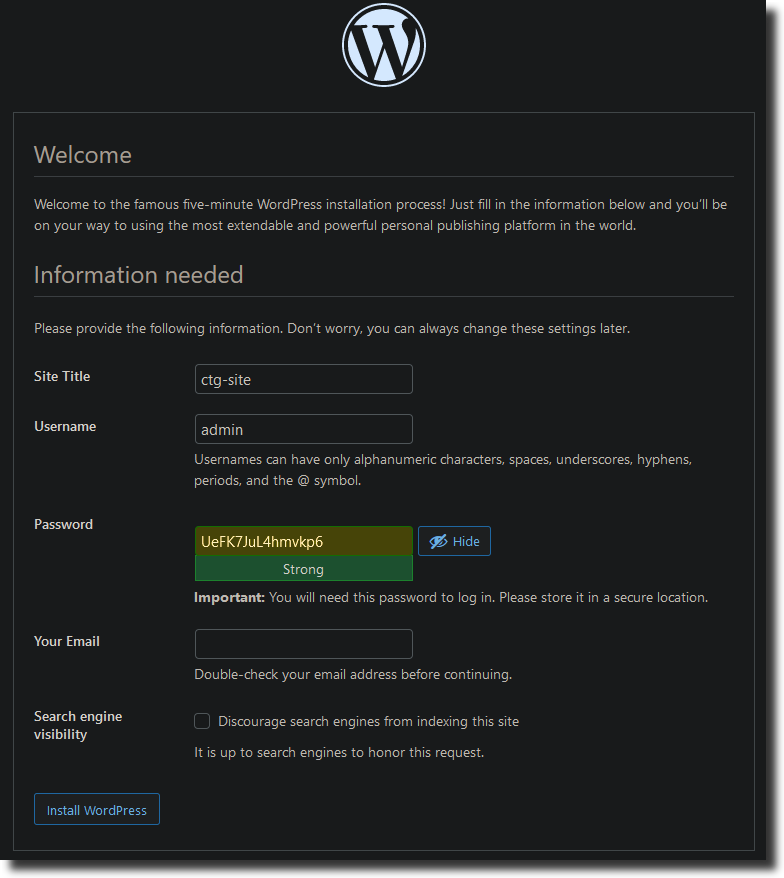
After selecting the language you’d like to use for your WordPress installation, you’ll be presented with a final step to set up your WordPress user and password so you can log into your control panel. Setting up the name of your site, email, and login credentials is straightforward at this stage.
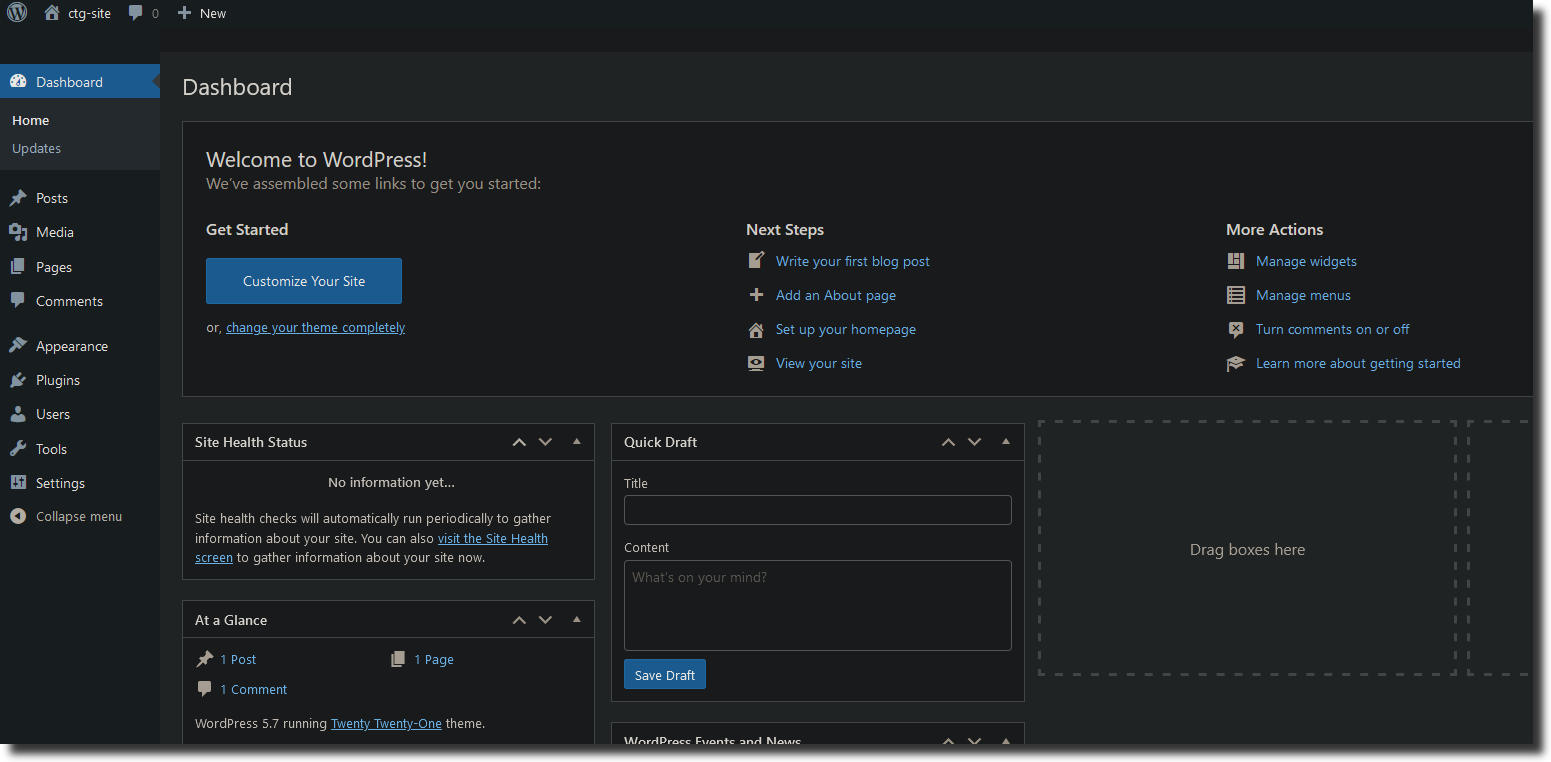
Once you log in, you will be taken to the WordPress administration dashboard:
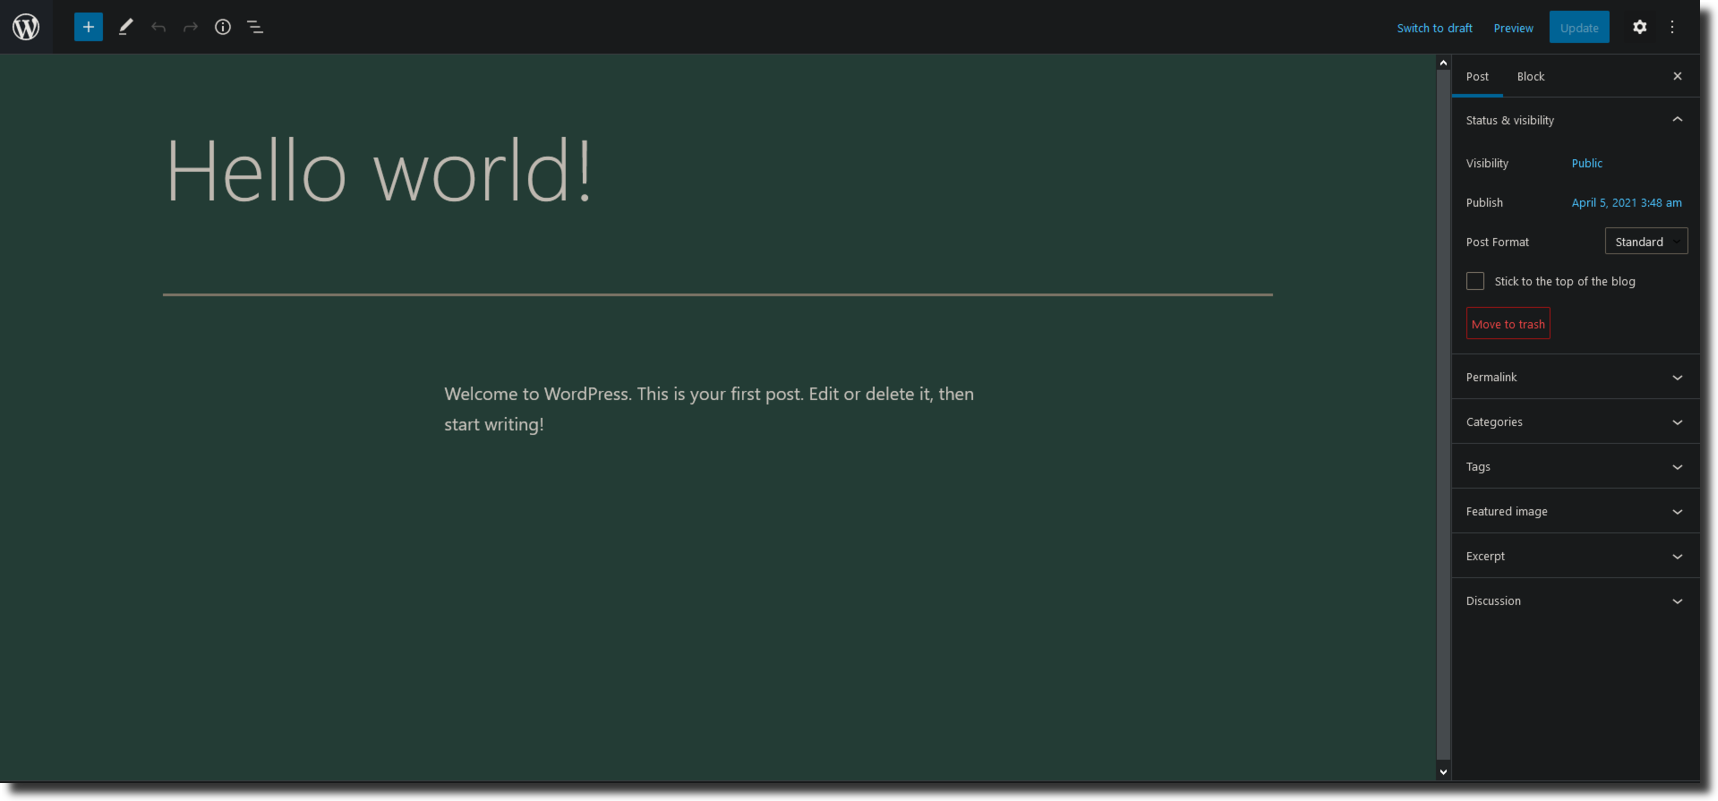
Some common next steps for customizing your WordPress installation include choosing the permalinks setting for your posts (can be found in Settings > Permalinks) and selecting a new theme (in Appearance > Themes). Below is a snapshot of our “Hello World!” blog post.